CUBE SYSTEMS
Water

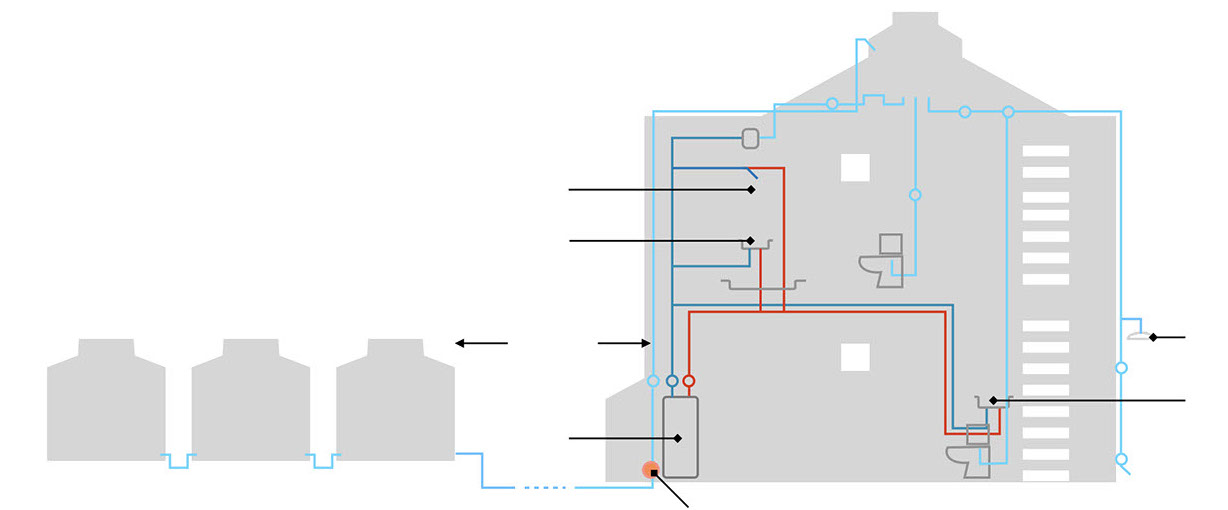
Hot and cold water Water is stored in a 290 gallon roof tank or cistern which is filled by water pumped from the 2,000 gallon water storage tanks. These tanks are periodically replenished by a large water truck from San Felipe. The water from the roof tank is fed by gravity to: 1. A sill cock at the Southwest corner of the building; 2. The upstairs toilet; 3. The hutch toilet; 4. the DC water pump. Cold water from the DC pump feeds directly to the bathroom sink, shower and kitchen sink, and to the water heater. Hot water from the water heater goes to the shower and the two sinks.
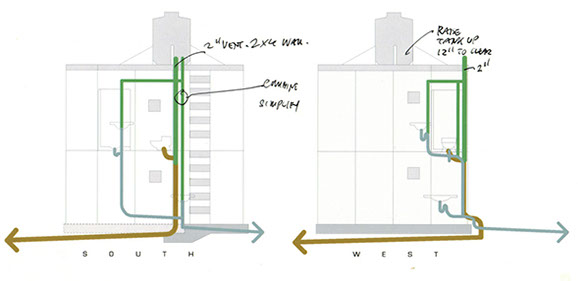
Drains and vents Drainage from the toilets goes by way of a 4 inch ABS pipe system which exits the building inside the toilet hutch on the South side and is carried via buried pipe to the septic tank located a few yards South. The septic tank is a simple concrete-lined container; there is no output or drain field. The slurry decomposes within the container. Over the course the years there has been no sign of the septic tank filling up yet. Water draining from the shower, the bathroom sink, and the kitchen sink is channeled into a 2 inch pipe and drains to a holding tank under the sleeping bench on the South side of the building. Each separate run of drain pipe is connected to a 1 inch vertical air vent—usually at the first elbow connection. These vents emerge at the rooftop and are surrounded by flashing. When walking on the roof, stay clear of the vents to avoid fumes.
Shower
Bathroom sink
Kitchen sink
Outdoor shower
Water heater
2,000 gallon water storage
50 feet
[right] Schematic of the Cube's water system. Gravity feed water: light blue; pressurized water: dark blue; hot water: red. The pipes for the gravity fed water are painted light blue and are clearly visible on the exterior and roof of the building. Gravity fed water from three 2500 liter of tanks is carried to the roof tank by the roof tank pump in front of the water heater
1
4
2
3
[below] Working drawings from the original plans of the Cube's drains and vents. Drainage to septic tank: brown; drainage to gray-water: gray; vents: green. The line to the septic tank now runs directly South of the Cube and the old septic tank on the North lot has been abandoned
Roof tank pump
Plumbing the Cube Once the walls were framed, the bathroom floor was tiled, and the fiberglass shower enclosure installed it was time to fit and connect the drain pipes and vents. My big mistake was to use PVC glue for the black ABS drain pipes. I had to tear everything apart and start again! Nevertheless, I found the drainage system relatively easy to construct and was able to complete the work within two weeks, relying on information in a book I had bought with the priceless title of Creative Plumbing.
As soon as the roof tank was installed I laid a system of PVC pipes carrying gravity fed water from the tank to the toilet and to a DC water pump mounted up in the ceiling. Water from the pump under pressure needed to go in 1/4' copper pipes that would have to be soldered together. This was a lot more difficult to manage than the plastic piping and the system was more complex. The original idea was to have a passive solar hot water system made from a coiled plastic pipes mounted on the rooftop, but I was persuaded by a neighbor who is a retired plumber to install a small, inexpensive propane hot water heater instead. (This water heater would break down within three years, was replaced with a similar one which also succumbed to corrosion three years later. The current heater is the fourth one to be installed!)
In an effort to keep the pressure water system exposed and accessible should anything go wrong, the hot and cold water pipes travel for most of their distance alongside the ceiling joists and are clearly visible. Many of the pipes converge inside the wall dividing the bathroom sink and the shower. While the framed walls still open, the day of reckoning would come when all the copper pipes were in place and the water pump was switched on to test the system under pressure. Alas, I discovered that I had inadvertently created a sprinkler system as water spurted from incorrectly soldered joints at several points in the ceiling. Fortunately neighbor Lee and a friend were at hand with a blow torch and some solder and graciously fixed the leaky welds.

Long-term water storage system Maintaining an adequate water supply at the Cube, though not difficult, requires a degree of awareness and forethought. A supply of water that can last months, rather than days, would eliminate much of the effort that goes into keeping the roof tank full, and would operate semi-automatically. Such a water system would not only make staying at the Cube more carefree but it would also make it possible to maintain plantings that could include bushes, trees, and flowers.
The system, completed in 2015,consists of 3 interconnected 2500 Liter (660 gallon) tanks situated on a cement block pad to the South of the shed. Filling takes place from the wash road where access is convenient for a large water truck . Because the tanks are connected hydraulically, water flows from the first tank to all the others so that all are filled at the same time. Water from these tanks travels by gravity via underground pipe to the compartment under the stairs of the Cube where the hot water heater is housed. Here it connects to an electric pump which propels the water up to the roof tank when it needs to be refilled. It will still be necessary to monitor the level in the roof tank and activate the roof tank pump when the tank is getting empty.
With a constant water supply available there is an opportunity to plant a garden of some kind which can be irrigated from an automatically controlled system. The lack of consistent watering while the building was vacant has jinxed all previous attempts to establish plantings and trees on the site.
[above] Work in progress 2015. The three tanks are temporarily lashed to the block pad with ropes which have now been replaced with cables. Click the link to view a sldeshow the the tanks installation
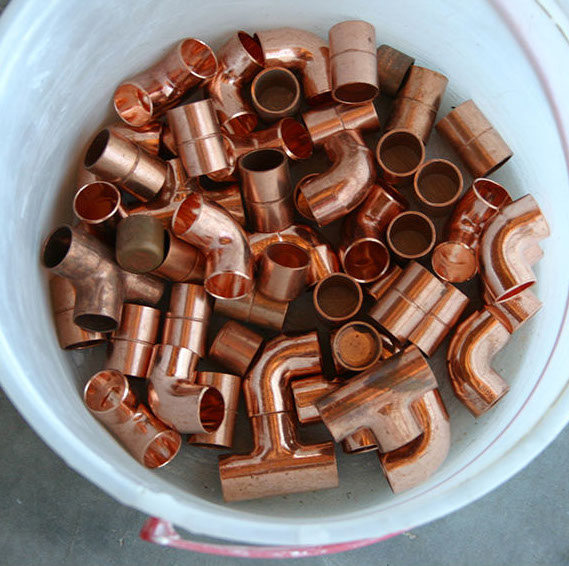
[above] Copper elbows ready for soldering. Click the link to view a slideshow telling the story of the Cube's plumbing