THE MAKING OF THE CUBE
Construction History

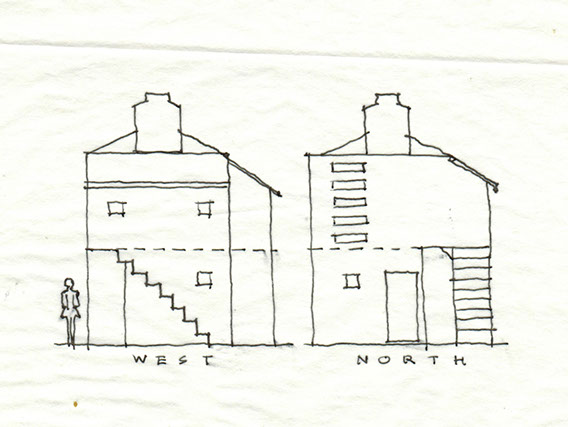
[above] After a set of blueprints were drawn on the computer it became obvious that a near-vertical ladder for access to the upper floor was not practical and a stairwell had to be improvised. The pitched roof shown in these sketches proved to be unnecessary
Four extra panels mounted on trusses. Eight more batteries added
Shed with solar
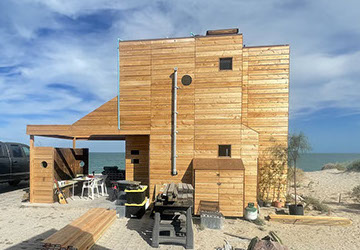
Complete structure
Cement block parking pad
Concrete ramp from wash
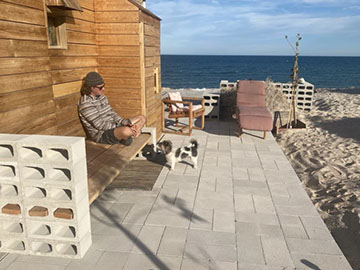
North porch
North bench built incorporating relocated annex structure
Shed extension built, wind generator removed
Clear site
Solar panels removed from Cube roof and installed on shed, plus 6 additional panels to total eighteen panels
Sixteen 6v Lead-acid batteries replaced with eight 12v gel batteries
Four solar panels are stolen. Four Panels on annex structure are moved to Cube roof to prevent theft
Four more panels mounted on annex structure to total sixteen panels.
Rotating ventilators added to roof
The best laid schemes o' mice an’ men gang aft agley.
—Robert Burns
Best laid schemes Using the same 3D computer modeling program that I had used to create animations, I began to imagine different types of buildings. I decided on simple wood framing with a plywood skin for the structure, drawing my inspiration from Richard's house and many other sources. Perhaps the easiest 3D object to make on the computer is a cube made of wood. And that is how the concept of the Cube began.
Setting aside some rather fanciful ideas about what might be built on the site over time, I focused on drafting plans for the Cube building and its shed. These were not proper architect’s drawings with dimensions and materials lists and things of that sort, which was rather unsurprising since I am not (and never will be) an architect. The drawings overlaid a grid of squares, each representing 1 square foot. In this way one could easily calculate materials by counting the squares. With Richard as my trusty partner, we had ordered the wood and hardware from The Home Depot in Mexicali. Being an experienced carpenter, Richard was charged with working out the engineering details of the structure, including a way of supporting the heavy roof tank.
It was during the five hour drive from Del Mar to Campo Cadena that we realized that the steep ladder from which one would reach the upper floor would be too challenging for the women who planned to live there, one of whom was in delicate health. So the plans were quickly re-drawn on the spot to accommodate a stair well. Shortly after we got to the site our truck from Mexicali arrived. The lumber was quickly unloaded, but I recall that most of the rest of the day was taken up by Richard with his 4-wheel drive pulling the hapless truck out of the soft sand in the wash.
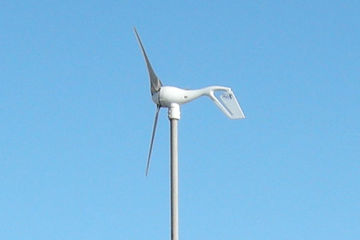

Wind generator installed

2003 2004 2005 2006 2007 2008 2009 2010 2011 2012 2013 2014
CLICK DOTS TO VIEW IMAGES. CLICK REFRESH TO HIDE THEM
I can work with my hands, you see. That’s one thing I can do. I never knew I could. But I can do all sorts of things now, with my hands. You know, manual things. When I get that shed up out there… I’ll have a workshop, you see. I… could do a bit of woodwork. Simple woodwork, to start. Working with… good wood.
—Harold Pinter
Start with a shed The two man Cube-building team divided its tasks thus: Richard was to frame the main house while I was to build the shed and produce a supply of electricity from the solar panels. Of course, we would each lend the other a hand when large objects needed to be lifted, and our future tenant, Happi was always available to assist. Working with a generator, we began our respective assignments in May of 2004. Some of the 2 x 4s that had come down from Mexicali were twisted in rather creative ways, and it was quite a challenge to torque them into alignment. Relying on the great strength of the 3/8" plywood the framing of the shed was quite sparse with studs 24" on center, so the construction went fairly quickly.
However, the intense heat of July was now fast approaching. The shed roof was sheeted with plywood, allowing U shaped steel brackets to protrude at intervals. These brackets would support 2 x 3 rails which, in turn, would support the panels. We then applied two layers of roofing material. With the roof structure in place I connected the eight Unisolar panels to the charge controller, the charge controller to the batteries and successfully tested the system. Now it was time to mount the panels, house the eight batteries in a wooden box and connect them to an inverter. By some miracle it all worked (at least at first) and we now had enough power to operate drills, saws, and other power tools. The annoying buzz of the generator gave way to the gentle murmur of the sea shore as the work now focused on the main house.

[above] The shed at the completion of its first phase with eight solar panels in place. This was to be the power station for the construction of the Cube
2015 2016 2017 2018 2019 2020 2021 2022 2023
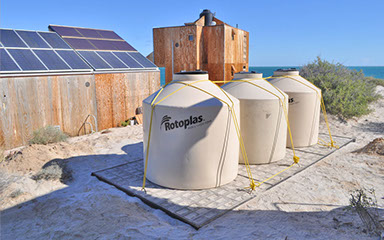
2500 liter water tanks installed behind shed for a total of 2000 gallons
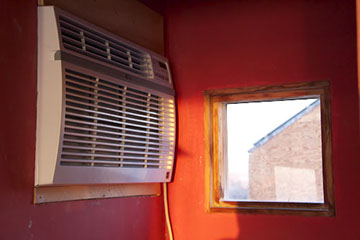
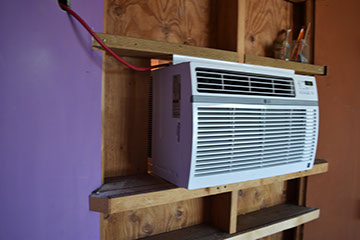
Stairwell air conditioner
Bookcase air conditioner. The air conditioners run off a generator installed in the shed
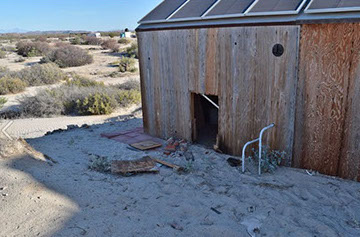
Shed break-in. Thieves took a generator and an inverter. Afterwards the inside on the shed was lines with steel mesh and OSB to discourage further robberies
Replacement of plywood panel on west wall. The resulting juxtaposition of new and old plywood looked odd
Brick patio extensions, outdoor sleeping platforms and outside bathroom
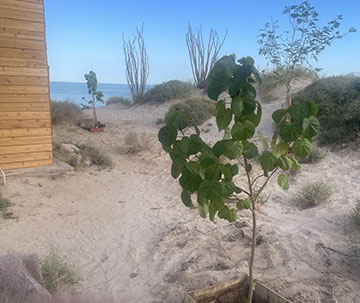
Tree planting and irrigation system
Cedar siding. 1 x 6 fence boards applied over existing plywood
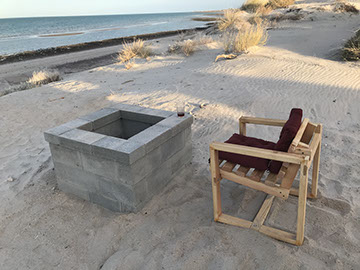
Fire pit and outdoor furniture
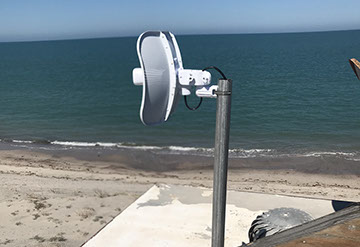
Internet upgrade with speed and reliability comparable to American standards
The making of a cube As the first wall was lifted into place We realized someone had blundered. There was a noticeable discrepancy between the horizontal alignment of the header beam and the horizon of the Sea of Cortez beyond it. Obviously the concrete pad that the wall was standing upon was out of level. We were luck in having the natural reference available to us, otherwise the error might have gone undetected and the whole house built out of plumb. so the bottom plate had to be shimmed up to compensate and a layer of mortar added below it.
Richard had carte blanche in devising the details of the framing and selected 2 x 6 studs for extra strength. He also added 2 x 12 uprights at intervals on the lower floor to create a structure designed to endure hurricanes and earthquakes. As the framing of the lower floor neared completion I had finished the shed and the electrical system was now in operation. Son-in-law, Ben and I then began to lift the 4 x 8 foot 5/8 inch plywood panels into place and nail them to the Cube's lower floor outside walls.
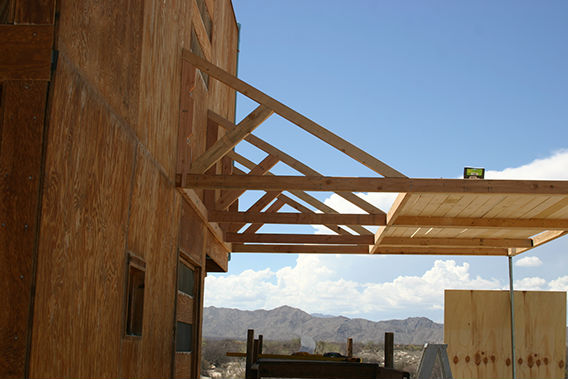
While Richard began to frame the stairwell I began to nail cleats to support the steep flight of steps, having considered and abandoned making a a pair of traditional notched stringers for this purpose. This was the kind of "fudging" that was typical of the whole construction process. With stairs in place, Richard moved on to the the upper floor while I worked on installing the eight foot wide sliding glass door that was to be the main feature of the East wall of the lower floor. That accomplished, I next made the set of triangular trusses that would support the water tank on the roof. The plywood panels for the upper story were applied with the aid of improvised scaffolding—a particularly scary job during the frequent wind storms that occurred. It was during this phase of construction while the walls were still open that I installed the rough plumbing and the fiberglass shower stall.
As soon as the plywood sheeting was nailed down to the flat roof Richard’s mission was accomplished. It was now up to me to apply the roofing material and install the water tank that had been on the lot when we acquired it. I hauled up the trusses to the roof as open frames and applied the plywood skin once they were in place, otherwise they would have been too heavy. Although the water tank was empty when I tied a rope around it and began to lift it onto the roof, it was awfully heavy. Fortunately one of the locals spotted me struggling to haul up the tank by myself and nimbly climbed a ladder to give it a lift from below. The Cube, from the exterior at least, was now complete. It now was to become a dormitory for me as I now concentrated on making the windows and doors.
Doors and windows Except for the sliding glass door, all the windows and doors in the cube are hand made from scratch. The windows are of three types: Fixed glass rectangular, geometrically shaped with insect screen, and slatted rectangular with insect screen and shutters. In addition, there is one operating window, hinged at the top and opening inwards above the kitchen sink.
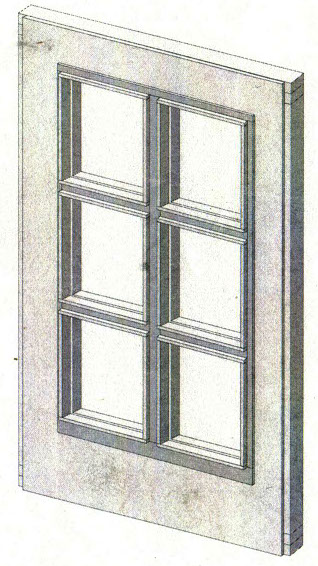
There are four single-pane fixed-glass windows about 24 inches square, and a 20-pane cluster of windows on the East wall of the upper story. In each case, the glass is held in place by a frame of cedar and a double layer of weather-stripping. The construction method is as follows: first I nailed the outer frame in place. Then I stuck the adhesive side of the weather-stripping to the edge of the glass, both inside and outside. Next I cut the inner cedar frames and pushed them very tightly against the weather stripping as I nailed the inner frame in position. Granted that this method is crude and simplistic, it nevertheless did provide a sufficiently tight seal to keep out both wind and water. I doubt whether this technique would work in any less arid a climate.
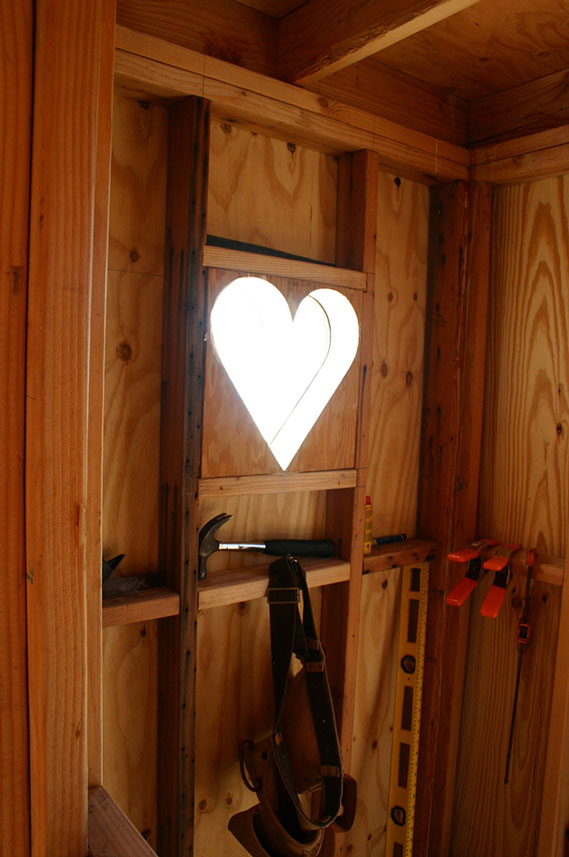
The upper floor has three fancifully shaped windows in the form of a heart, a star, and a circle. These windows are also primarily for ventilation and have insect screens built into their structure. I made two plywood squares to fit the rough opening for the window and cut the window opening shape out of these using a jigsaw. I cut the same shape from a block of styrofoam insulation and formed a sandwich consisting of plywood, insect screen stapled to the back of the plywood, stryofoam, and plywood. Once in place, the styrofoam was finished with a layer of plaster and painted. (Over time, unfortunately, the plaster has begun to deteriorate.) Because making shutters for these windows would have been impossible, circles of plexiglass screwed to the inside walls serve the same purpose during cold or windy weather.
On the upper floor there are also two wall openings divided by two layers of horizontal plywood slats. Insect screening is stapled between the inner and the outer layer of slat. The purpose of these windows is to provide ventilation. Hinged shutters with bolts allow for closure during windy periods, or when it is cold during January.
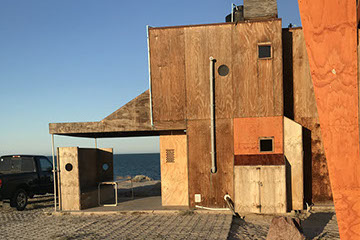
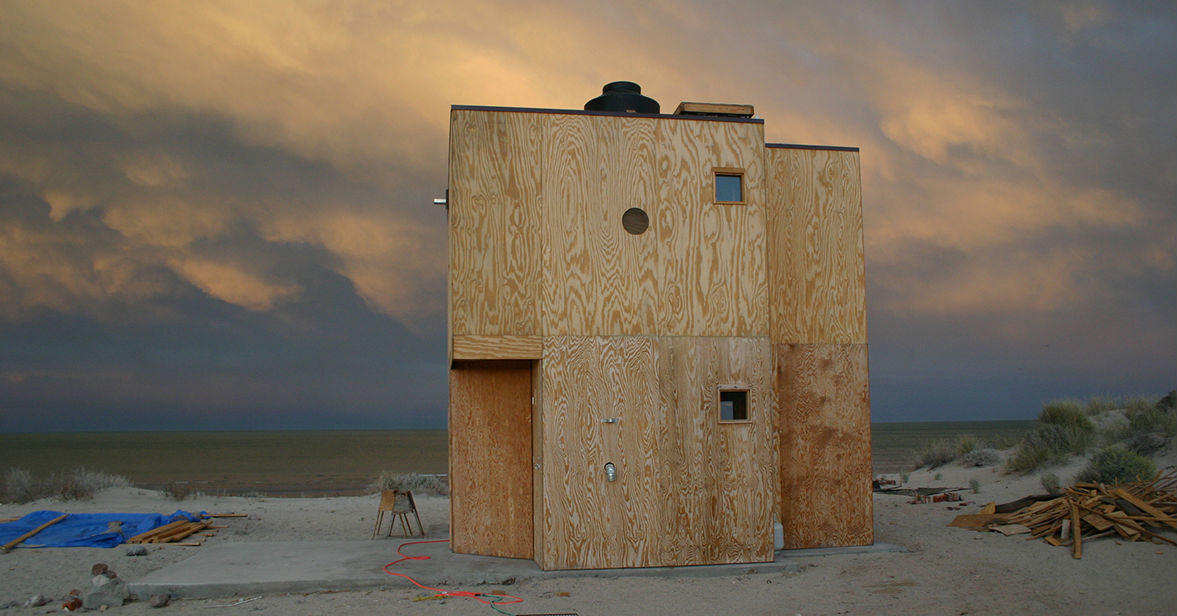
[above] The recently completed house stands in its most starkly cubic form
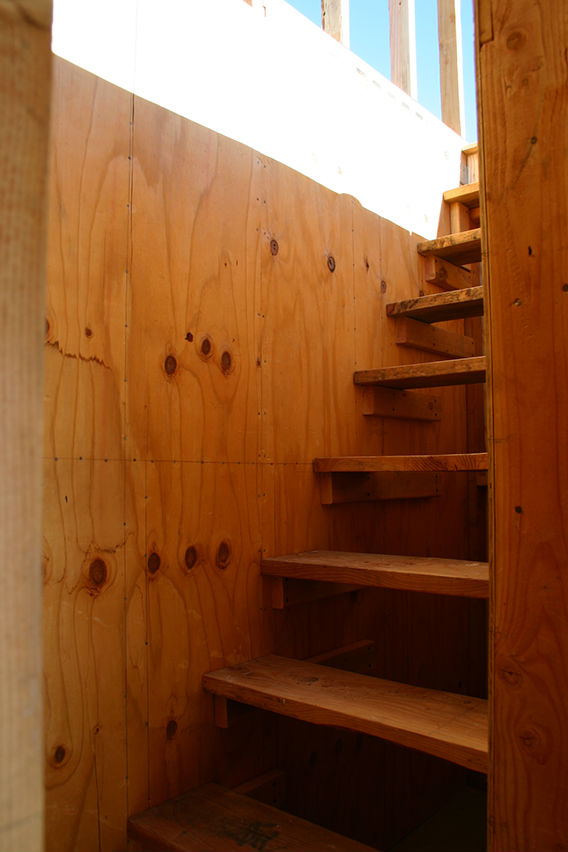
[above] The stairs supported by cleats. Plywood lines the interior of the stairwell for extra strength
1
1

1
1
[above] Working drawings for the fixed glass windows. During construction weather stripping 1 was inserted between the glass and the cedar frame.
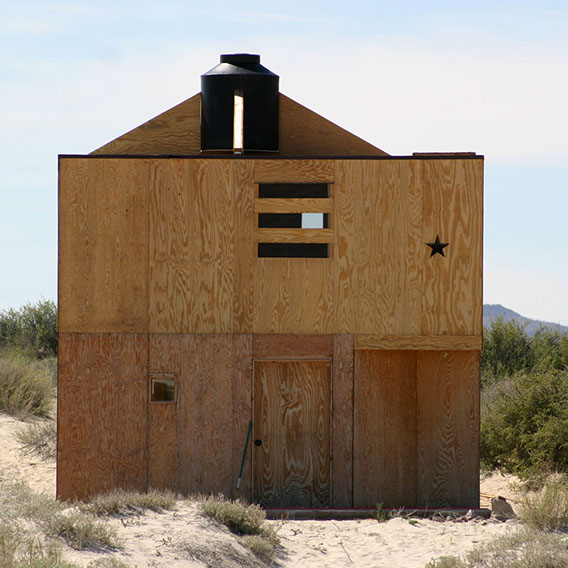
[above] The main door, the slatted bedroom window, a square glass window downstairs and the star shaped window at the top of the stairwell are all visible on the North side of the Cube
[left] The sandwiched layers of plywood, insect screen and styrofoam forming the heart window mounted in the rough opening
The main door to the building is made of two plywood panels screwed to a frame of 2 x 4s. I felt it would be out of keeping with the style of the building to install a conventional front door. It took some effort to hang such a massive door single handedly.
Before the Cube interior could be finished, of course, the hot and cold water pipes, the propane lines, the drains and the electrical wiring has to be installed while the walls were still open. These topics are described in detail in another section of this website.
Painting and decorating After the wiring and plumbing comes the final stage to make the building habitable with a functioning kitchen, a bathroom and insulated and painted interior walls. Ikea provided all the components of a very functional kitchen all in convenient cardboard containers which could be easily transported across the border. With my recent photographic safari to Rosarito in mind I raided the paint store in San Felipe for all the most vivid hues I could find. The Home Depot in Mexicali was the source for a serviceable toilet, fridge, countertop, and sink.
Once the building was fully habitable it was still necessary to return to the exterior and finish nailing the plywood panels that had been only tacked in position to expedite the construction.
Additions and improvements Since 2005 there have been several important additions to the building to resolve problems that had arisen from the day-to-day living experience. (The interactive timeline above gives an overview of these.)
Even before the building was finished we found it was necessary to add four more panels to the shed by extending the roof-line downward. This would prove to be a mistake because two years later the panels were stolen. Shortly thereafter an additional four solar panels were mounted on a stand-alone structure between the shed and the Cube. This group of panels was attached to tilting trusses that would allow the panels to face 30° South of directly overhead.
Access to the Cube from the roadway below was difficult, so we hired a crew of locals to pave the ramp from the wash with concrete.
To provide an outdoor shaded area adjacent to the building we constructed a porch with a slatted canopy on the North side over the original concrete pad which extended 10 feet from the house.
The concrete ramp was a great benefit, but vehicles were constantly getting stuck in the soft, wind-blown sand surrounding the building. The solution was to be a layer of ordinary cement blocks laid upright in the sand arduously in the hot sun—an inexpensive but effective way to provide a stable parking area.
In 2009 the Cube was the victim of a break-in in which four solar panels that were attached to the lower roof-line of the shed and the inverter inside the shed were stolen. This prompted the re-location of the four solar panels from the stand-alone titling structure, which were also vulnerable to theft, to the roof of the Cube itself. The supporting structure for the panels was dismantled and moved to the North porch where it would become part of the North porch bench.
The solar panels on the Cube roof were now a long way from the charge controller in the shed and DC current drops off significantly over distance. We also needed to compensate for the loss of the stolen panels. To address this problem in 2012 we acquired six more panels and doubled the length of the shed to accommodate the new panels plus the ones that were on the Cube roof. At the same time we replaced the sixteen failing 6 volt lead-acid deep cycle batteries with eight 12 volt gel batteries. The saga of the photovoltaics is described in greater detail in another section.
Further additions and improvements
2015 Three 2500 liter water tanks, a generator, an air conditioner in the stairwell, re-lining of the shape windows with metal.
2017 Another air conditioner installed in the bookcase, a septic tank near the south side of the building.
2019 Deteriorating plywood panel replaced on the west elevation, Grant house demolished.
2021 Internet upgrade, battery bank replaced, fire pit and custom-made outdoor furniture, living room divider modified.
2022 See-through window blinds added to sliding glass doors, Grant house garage demolished, cork flooring upstairs, water pump replaced. The lot to the North of the Cube was annexed.
2023 Tree planting and irrigation system, Cube and shed exterior refurbished with cedar fencing boards, sleeping platforms and patio extension on east and south sides, sleeping platform above north porch, tiny bathroom installed south hutch, remote camera system installed.

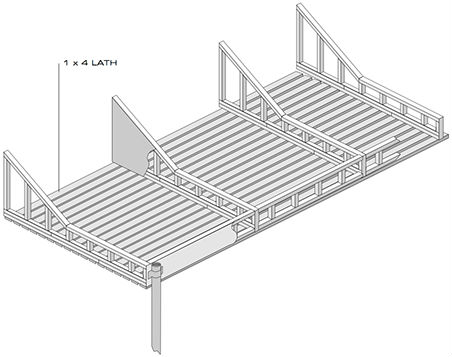
[below] Working drawing for the canopy structure of the North porch. The final construction used a simplified truss structure